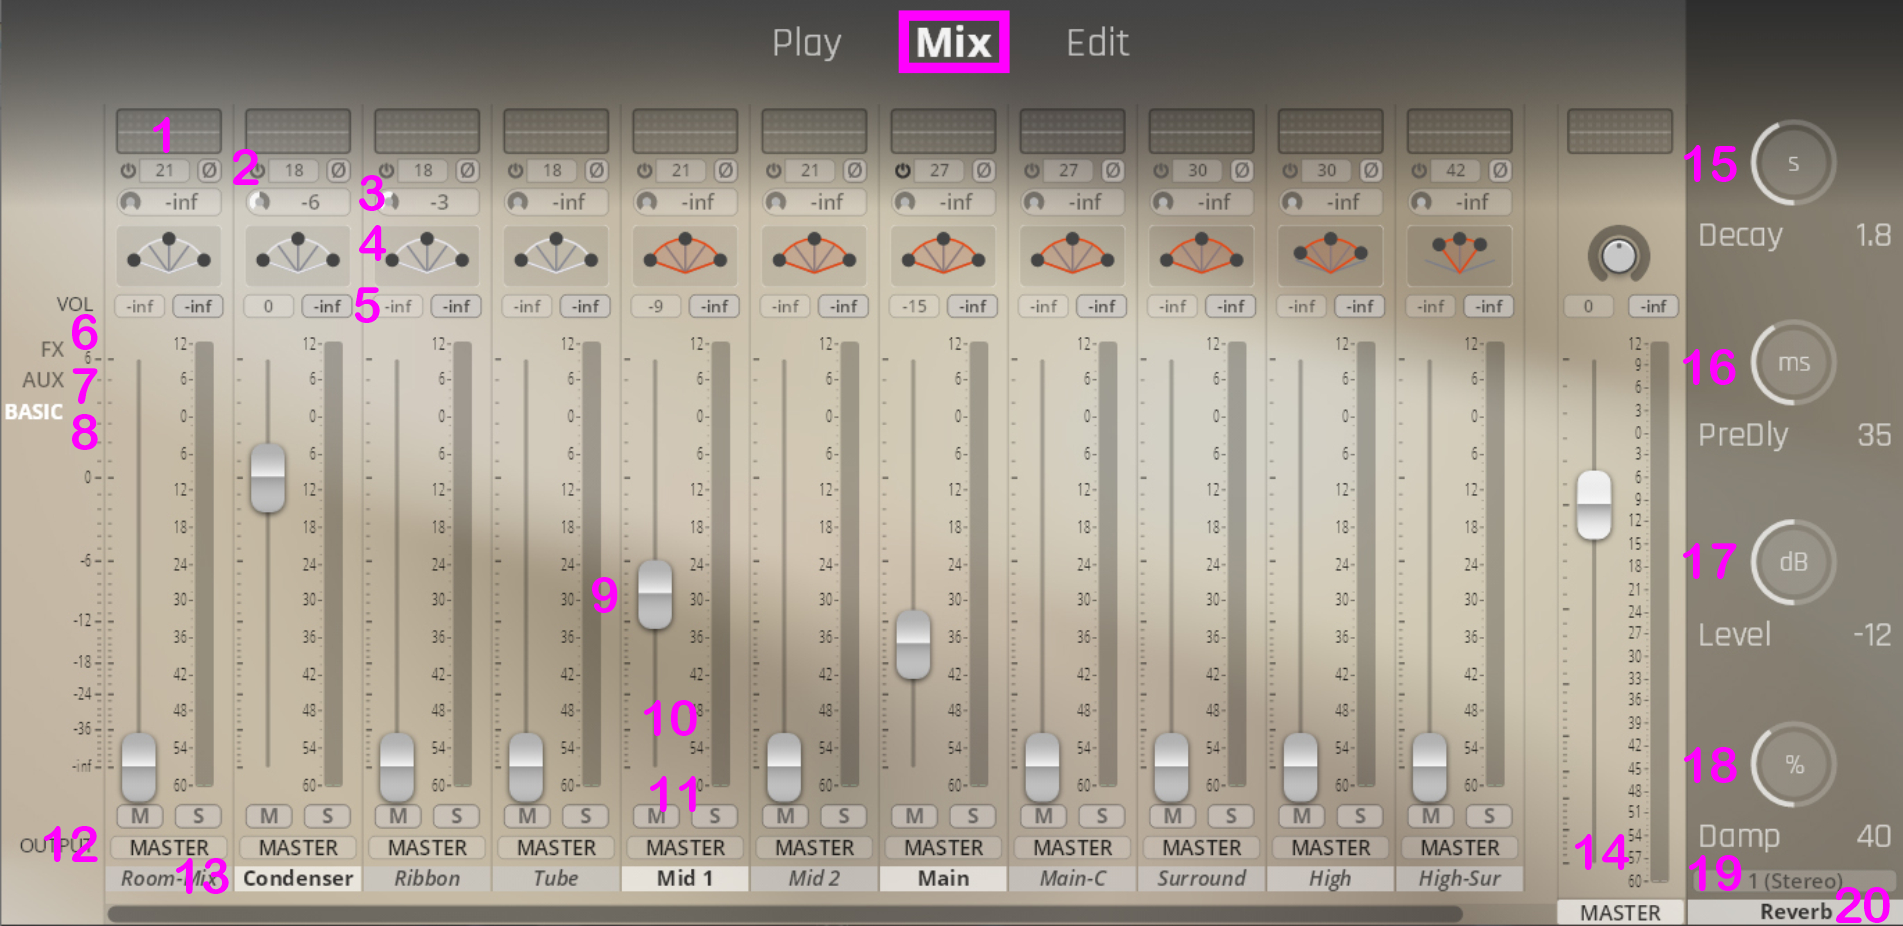
EQ: Channel Equalizer. When double-clicked, a window with all available settings will open. Note that the Power button is integrated into the channel view.
Delay: Channel delay. Adjust these settings to add runtime to each channel, for impressive results in room perception. Values in milliseconds. Click-drag or double-click to edit.
Command/Ctrl-click to reset. You can also invert the channel phase – the icon turns orange when inverted.Reverb: Reverb send. Adjust the amount of reverb that should be added to each channel. Mostly applied to the close / mid microphones. Reverb settings are available in the column to the right. Click-drag or double-click to edit.
Command/Ctrl-click to reset.Pan: Channel panning. Choose between ‘Balance’ and ‘PowerPan’. Pan Law can be adjusted in Settings => Engine.
Volume Slider Values: Click-drag or double-click to edit.
Command/Ctrl-click to reset.FX View: Access all integrated FX plug-ins.
AUX View: Create additional routing options.
Basic View: Shows EQ, Delay, Reverb, and Panning options for each channel
Volume Slider: Grab at handle to adjust, and hold
Shiftfor exact adjustments. Click-drag or double-click to edit.Command/Ctrl-click to reset.Mute: Mutes the selected channel. Turns yellow when muted.
Solo: Solos the selected channel. Turns red when in solo mode.
Output: Output assignment. Choose from available outputs.
Channel On/Off: Click to activate/deactivate. Settings => Engine provides an option to unload samples when deactivating channels.
Master Channel: A great tool to use the internal EQ on your master mix.
Decay Time: Adjust the time for the reverb to last.
Shift-click-drag to fine-tune. Click-drag or double-click to edit the value.Command/Ctrl-click to reset.Predelay Time: Adjust the time between the end of the initial sound and the beginning of the first reflections being audible.
Shift-click-drag to fine-tune. Click-drag or double-click to edit the value.Command/Ctrl-click to reset.Reverb Level: Adjust the level of the reverb.
Shift-click-drag to fine-tune. Click-drag or double-click to edit the value.Command/Ctrl-click to reset.Reverb Damping: Adjust how much of the higher frequency content is dampened.
Shift-click-drag to fine-tune. Click-drag or double-click to edit the value.Command/Ctrl-click to reset.Reverb Output: Output assignment. Choose from the available outputs.
Reverb On/Off: Switch the integrated algorithmic Reverb ON/OFF. This reverb is designed to "sweeten" the sound of Vienna Synchron Stage, much like in a real-world mixing situation.
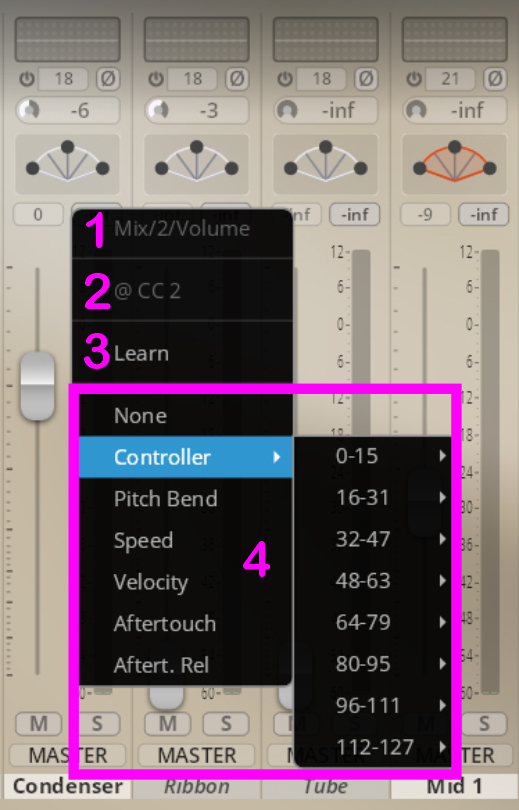
These context menus are available via right-click for all controls in the Mix View. Additionally, you can choose between Balance and Power Pan in the PAN Section.
Selected Control: Shows controller on GUI
Assigned Source: not visible if not assigned
Learn: Click to MIDI-learn
Available Control Sources: Choose from this list.
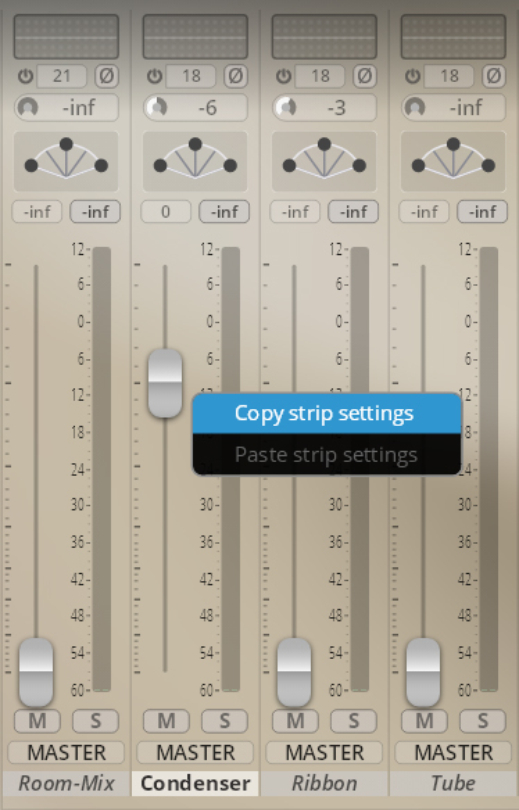
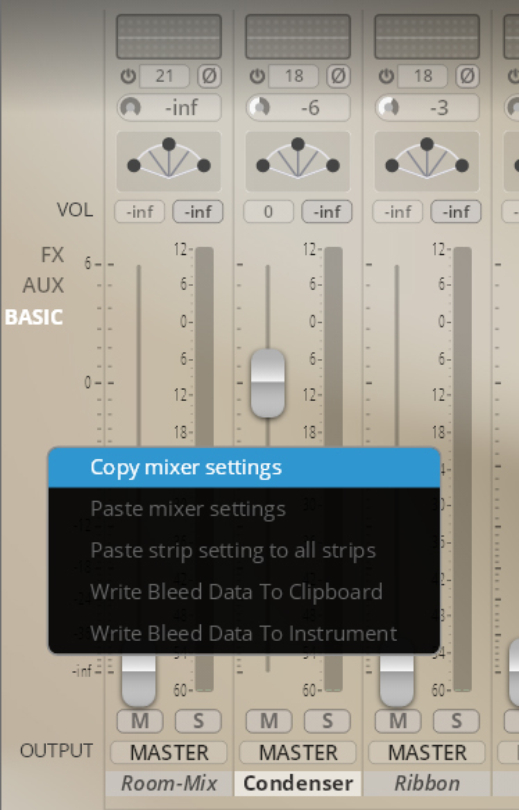
Right-clicking directly in the volume meter of a channel strip will let you copy/paste strip settings. Right-clicking the area left of the mixer (above the OUTPUT label) will present you with the options to copy/paste all mixer settings and to paste the settings of your previously copied mixer strip to all strips.
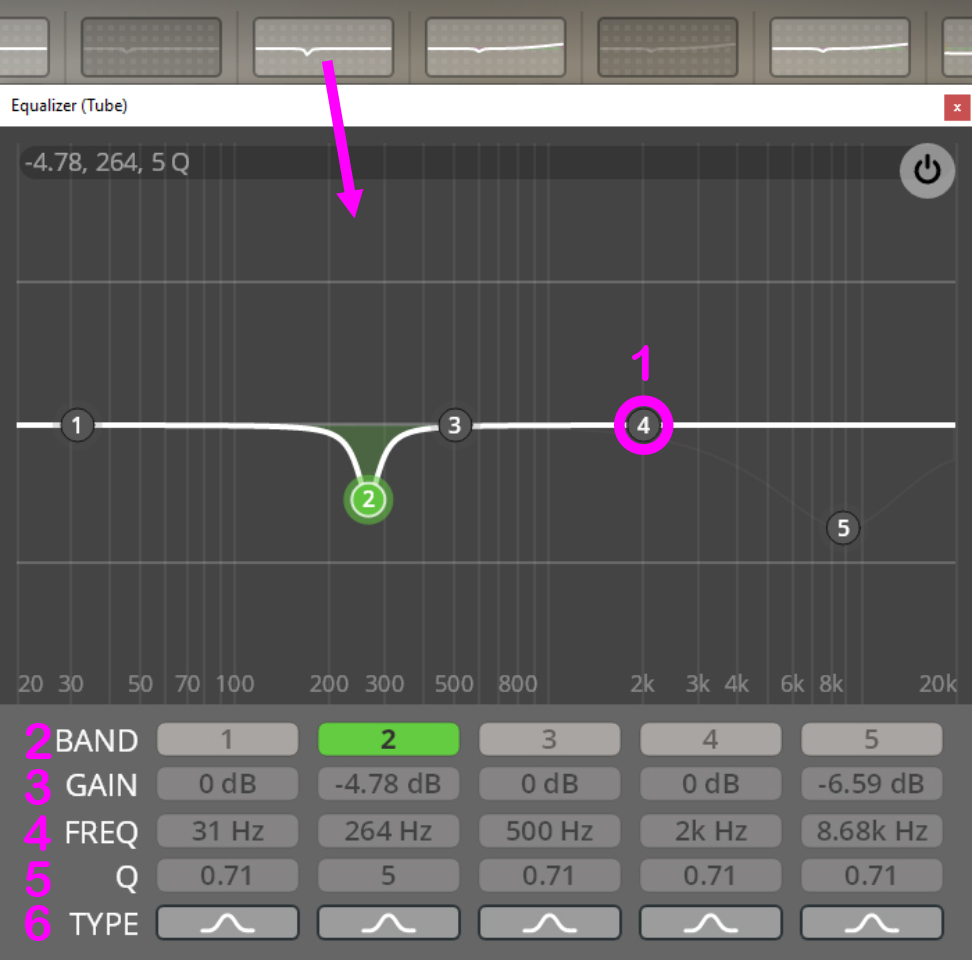
EQ Node: Click the BAND buttons to activate the corresponding band. In the GUI, right-click a BAND node to change the filter type. Use your mouse wheel to change the Q value,
Command/Ctrl-click to reset,Option/Alt-click to lock frequency,Shift-drag to fine-tune the settings.BAND: Activate/deactivate the filter band.
GAIN: The gain value of the selected node in the EQ display window.
Shift-click-drag to fine-tune. Click-drag or double-click to edit.Command/Ctrl-click to reset.FREQ: Frequency of the selected node in the EQ display window.
Shift-click-drag to fine-tune. Click-drag or double-click to edit.Command/Ctrl-click to reset.Q: Q value of the selected node in the EQ display window.
Shift-click-drag to fine-tune. Click-drag or double-click to edit.Command/Ctrl-click to reset.TYPE: Choose from these available filter types: Peak, Low-Shelf, High-Shelf, High Cut., Low Cut, Bandpass, Notch.

CENTER: Panning center, in %. Click-drag or double-click to edit.
Command/Ctrl-click to reset.WIDTH: Panning width, in %. Click-drag or double-click to edit.
Command/Ctrl-click to reset.DISPLAY: Grab nodes to adjust pan settings. Will change color when inverted.
Command/Ctrl-click to reset.BALANCE: PowerPan balance. Applies set amounts of balancing features.
Shift-drag to fine-tune.Command/Ctrl-click to reset.