Mix Tab
Basic View

EQ: Channel Equalizer. When double-clicked, a window with all available settings will open. Note that the Power button is integrated in the channel view.
Delay: Channel delay. Adjust these settings to add runtime to each channel, for impressive results in room perception. Values in milliseconds. Click-drag or double-click to edit. Command/Ctrl-click to reset. You can also invert the channel phase – the icon turns orange when inverted.
Phase Invert: Inverts the phase of the incoming signal.
Reverb: Reverb send. Adjust the amount of reverb that should be added to each channel. Mostly applied to the close / mid microphones. Reverb settings are available in the column to the right. Click-drag or double-click to edit. Command/Ctrl-click to reset.
Convolution Impulse Plug-in: Opens a Convolution Impulse Reverb Module equipped with customized Impulse ResponseFiles for SYNCHRON-ized products. Includes a Dry/Wet slider and and a convolution impulse browser.Available with SYNCHRON-ized product licenses only.Also see description below.
Pan: Channel panning. Choose between ‘Balance’ and ‘PowerPan’. Pan Law can be adjusted in Settings => Engine.
Volume Slider Values: Click-drag or double-click to edit. Command/Ctrl-click to reset.
Volume Slider: Grab at handle to adjust, hold Shift for exact adjustments. Click-drag or double-click to edit. Command/Ctrl-click to reset.
Mute: Mutes the selected channel. Turns yellow when muted.
Solo: Solos the selected channel. Turns red when in solo mode.
Output: Output assignment. Choose from available outputs.
Channel On/Off: Click to activate/deactivate. Settings => Engine provides an option to unload samples when deactivating channels.
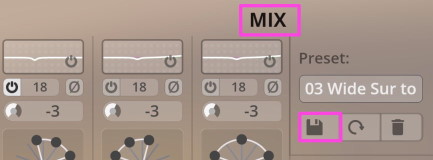
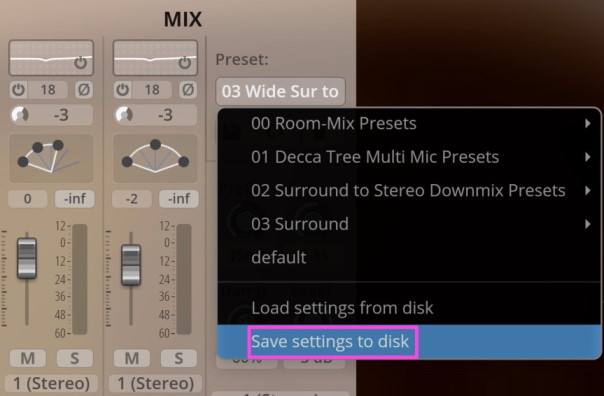
Mix Preset: Choose from available Room-Mix Presets and load/save more presets from disk.
Save/Reload/Delete: Always affects current mixer preset.
Reverb Settings: Adjust the setting of the integrated algorithmic reverb. Shift-click-drag to fine-tune. Click-drag or double-click to edit value. Command/Ctrl-click to reset. Output Assignment and Reverb On/Off below.
FX: Shows the channel FX slots.
SEND: Shows the send slots.
Basic: Shows the basic mixer view.
AUX View
The AUX View of the Mixer offers a maximum of 4 Auxiliary Sends on top of the volume sliders. A classic and resource-friendly way to add effects to your mix.

FX View
Choose from a great selection of FX for each channel separately. A description of all FX can be found in the chapter FX Channels.

Bleed View
This feature is only available for Synchron Power Drums!
It lets you adjust the bleed level of other instruments into the channels of specific microphones. An activated insert of a BLEED signal is displayed in blue (which will also be the case for all inputs in to ambient microphones), and the activated original instrument source that belongs to each channel will be displayed in green.
Bleeding lets you adjust the room sound in a unique way, and you can also "roughen up" the sound of your drum mix quite a bit by adding some of the bleeding sound of, e.g., a bass drum that is also captured in the snare drum microphone (as you can see below).
You can enable each slot with the power sign and adjust the value by dragging the bar from the right side of the slot.
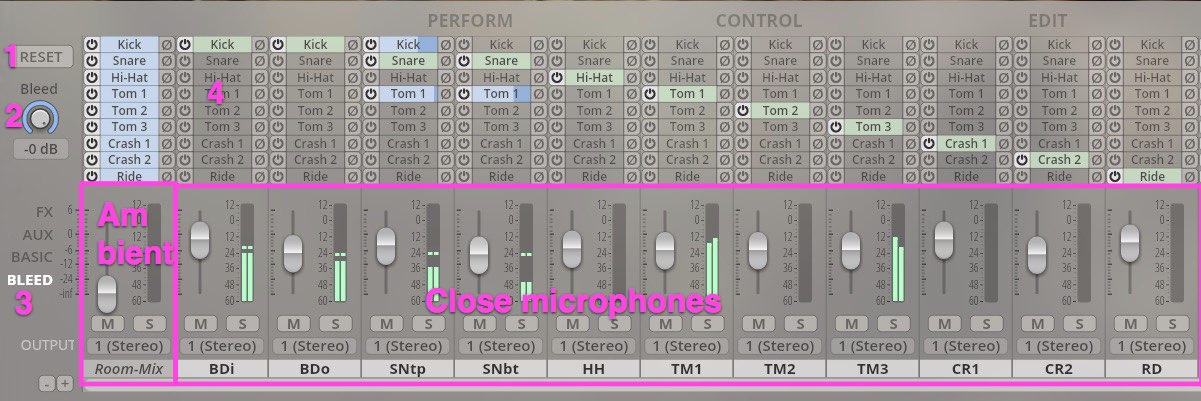
RESET: Resets all values to the original settings of the selected mixer preset.
Bleed: The Master Bleed knob provides control over the whole room impression. A powerful tool for every mix.
Bleed View: Click to see the bleed settings in your mixer.
Bleed slots: Adjust the amount of bleed signal that is fed to your instrument channel from other instruments.
Mixer Presets
There are multiple versions of Mixer Presets available when you open Browser. The management of mixer presets is much easier and clearer in the MixerPreset Browser.
Stereo Presets (visible for stereo plug-ins)
00 Room-Mix Presets
Our Go-To Presets are the ideal starting point for every recording, with as little microphones as possible and a ready-made Room-Mix channel that contains a mix of all available microphones from the Full Library. Easy adjustment by adding more or less direct signal (close, mid and back microphones).
01 Decca Tree Multi-Mic Presets
The Decca Tree takes care of the room signals, which in comparison with the Room-Mix will produce a more slender sound with less diffusion. The classic stereo recording with a lot of room for adjustments.
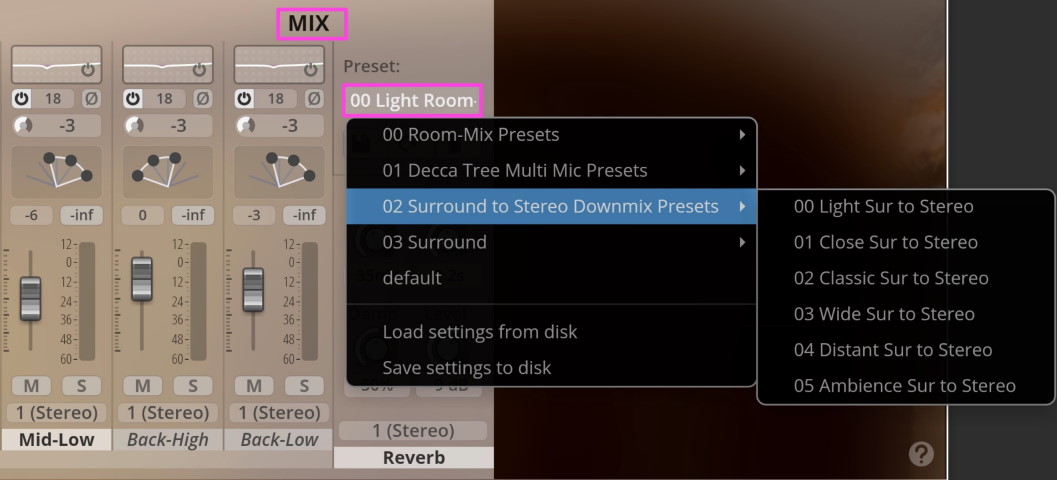
02 Surround to Stereo Downmix Presets (Full Library)
Utilizing all available microphones for more flexibility in the mix. The room microphones with their different sounds and the possible runtime delays help to create more diversity in the perception of room depth. Great to optimize positioning, details, contours and complexity in your mixes.
SYNCHRON-ized Presets (available only with a license for SYNCHRON-ized products)
You will find additional NARROW mixer presets available, which place the sections closer together at Synchron Stage Vienna.
Surround Presets (functional when Full Library is available)
Full flexibility for your surround setup. Send the close, mid, back mics as well as the decca tree microphones to your main L-R speakers, and your surround microphones to your surround channels accordingly.
Mixer Preset Creation
There are 2 options to save mixer presets:
Option 1
Create additional mixer presets or folders, click the disk symbol and enter your folder/preset name. Sorting will be alphabetical.
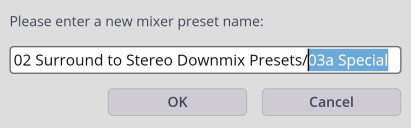
Warning
Newly created presets are only available when saved with a new User Preset, otherwise they will be lost!
Option 2
Save your additional mixer presets to disk and manage them as separate files in a location of your choice.
Note
Different products will offer a different mixer setup, so please bear in mind that product-specific mixer presets will only work with those products.
EQ
Double-click the Mixer EQ of each channel to open the EQ window.
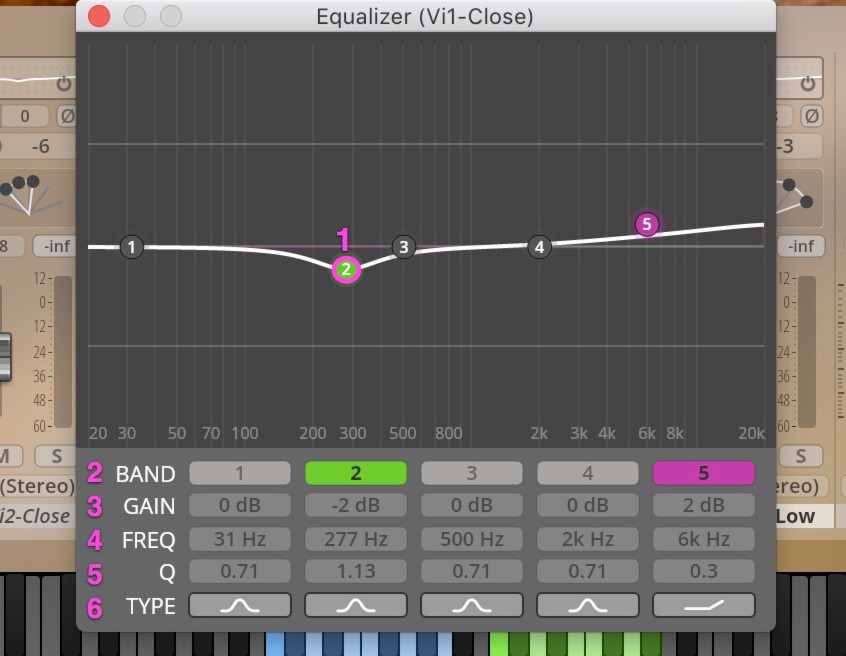
EQ Node: Click the BAND buttons to activate the corresponding band. In the GUI, right-click a BAND node to change the filter type. Use your mousewheel to change the Q value, Ctrl/Command-click to reset, Alt-click to lock frequency, Shift-drag to fine-tune the settings.
BAND: Activate/deactivate the filter band.
GAIN: Gain value of the selected node in the EQ display window. Shift-click-drag to fine-tune. Click-drag or double-click to edit. Command/Ctrl-click to reset.
FREQ: Frequency of the selected node in the EQ display window. Shift-click-drag to fine-tune. Click-drag or double-click to edit. Command/Ctrl-click to reset.
Q: Q value of the selected node in the EQ display window. Shift-click-drag to fine-tune. Click-drag or double-click to edit. Command/Ctrl-click to reset.
TYPE: Choose from these available filter types: Peak, Low-Shelf, High-Shelf, High Cut., Low Cut, Bandpass, Notch.
Power Pan
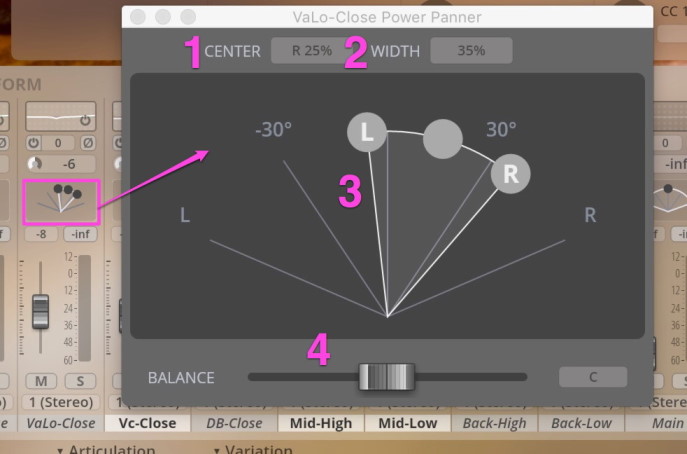
CENTER: Panning center, in %. Click-drag or double-click to edit. Command/Ctrl-click to reset.
WIDTH: Panning width, in %. Click-drag or double-click to edit. Command/Ctrl-click to reset.
DISPLAY: Grab nodes to adjust pan settings. Will change color when inverted. Command/Ctrl-click to reset.
BALANCE: PowerPan balance. Applies set amounts of balancing features. Shift-drag to fine-tune. Command/Ctrl-click to reset.
Impulse Convolution Reverb (for SYNCHRON-ized products only)
This additionalConvolution Reverb is based on our MIR PRO technology and offers a simple, yet effective way to integrate our SYNCHRON-ized with other products of our Synchron Series.
You can easily adjust the Dry/Wet Ratio to fit your mix.
Don’t forget that, depending on your chosen Mixer Preset,your reverb sends might also need some adjustment.
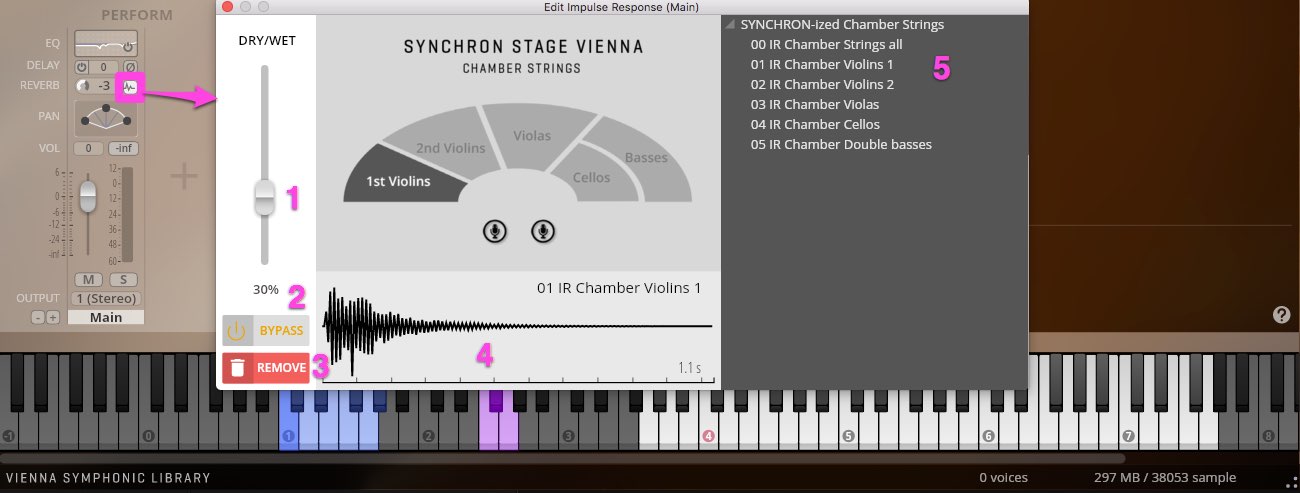
DRY/WET Slider: Controls the amount of reverb added to the signal. Higher settings will make the signal sound more embedded in the virtual space.
BYPASS: Will bypass impulse reverb processing. Will not release CPU resources.
REMOVE: Removes impulse reverb processing from the channel's processing chain. Will also release CPU resources.
IMPULSE RESPONSE DISPLAY: Displays a simplified waveform of the applied impulse response.
IMPULSE RESPONSE BROWSER: Browse through all available impulse files for your registered SYNCHRON-ized products. Double click on a file to load it into the channel's impulse reverb processor.
Mixer Context Menus
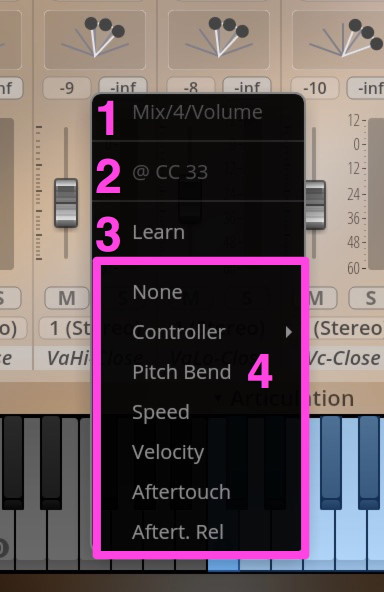
These context menus are available via right-click for all controls in Mix View.
Additionally, you can choose between Balance and Power Pan in the PAN Section.
Selected Control: Shows controller on GUI
Assigned Source: not visible if not assigned
Learn: Click to MIDI-learn
Available Control Sources: Choose from this list.
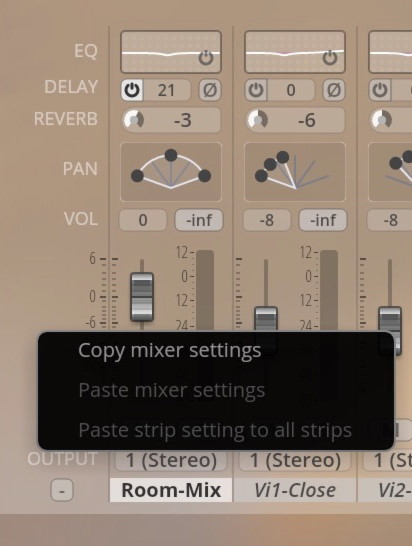

Right-clicking directly in the volume meter of a channel strip will let you copy/paste strip settings (screenshot to the left), while right-clicking the area left of the mixer (above the OUTPUT label) will present you with the options to copy/paste all mixer settings and to paste the settings of your previously copied mixer strip to all strips.