Navigation / The Mixer
The Vienna Ensemble Pro GUI will open in the background of your sequencer or on your networked computer. Hover with your mouse over each icon to see a description in the lower left corner (with the corresponding shortcut, if available)!
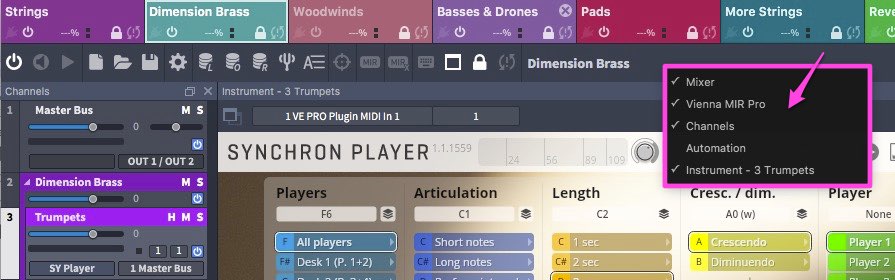
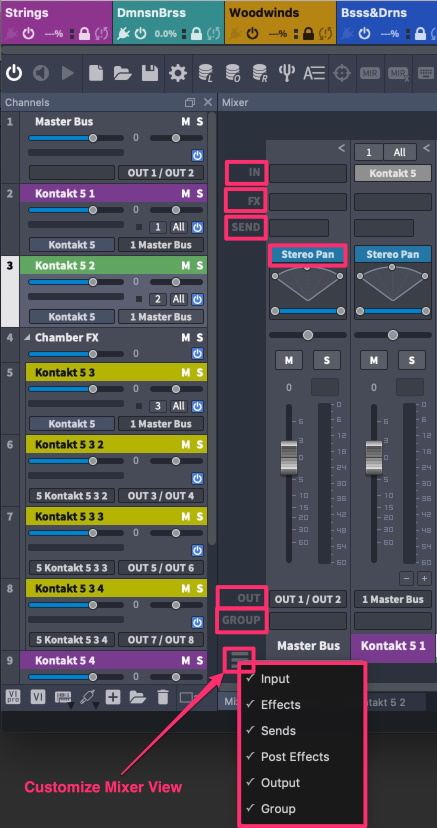
The Context Menu you get by right-clicking in the area to the right if the Instance Menu Bar lets you activate/deactivate the visual main elements of each instance:

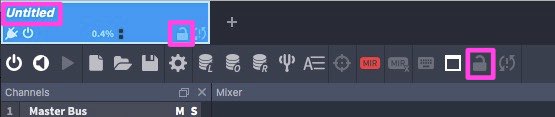
The taskbar in the upper left corner contains the following icons:
Enable/Disable Instance
Start/Stop Engine
Start/Stop Transport
New Project: Create a new project from scratch
Open Project: Open your saved projects: *.vep64
Save Project: Save your projects as *.vep64 files
Preferences
Learn
Optimize
Reset – now you can optimize ALL Vienna Instruments instances of a whole Vienna Ensemble Pro project at once!
Master Tuning: Changes the tuning of all inserted Vienna Instruments
Show Automation Mapping
MIDI Activity Focus: Will automatically switch to the channel that has been solo'd in your sequencer, or the only channel that is receiving MIDI signals at any given time. This convenient feature works with 1 MIDI channel only, by design.
Auto-Add MIR Pro will automatically add MIR Pro to each new channel (only visible if a MIR Pro license is available).
MIRx Mode opens the MIRx Settings
Enable/Disable Keyboard Shortcuts
Unsnap/Snap Instance
Preserve disconnects your Vienna Ensemble Pro instance from your sequencer, keeping all the samples loaded (more information)
Decouple/Couple Instance (more information)
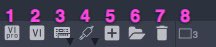
In the lower left corner , you can add Vienna Instruments Pro (1) and Vienna Instruments (2) instances, virtual instrument plug-ins (3, AU/VST) , Insert channels (4), bus channels (5) and folders (6). You can delete selected channels (7) and toggle the narrow channel strip view (8) with 3 different zoom stages for the left channel pane.

In the lower right corner , you will find some more information available for each connected instance.
Channel Configuration, Tempo (BPM), Plug-in Latency Compensation (in samples), CPU Meter.
Note: Plug-in Latency Compensation can be disabled in Preferences.

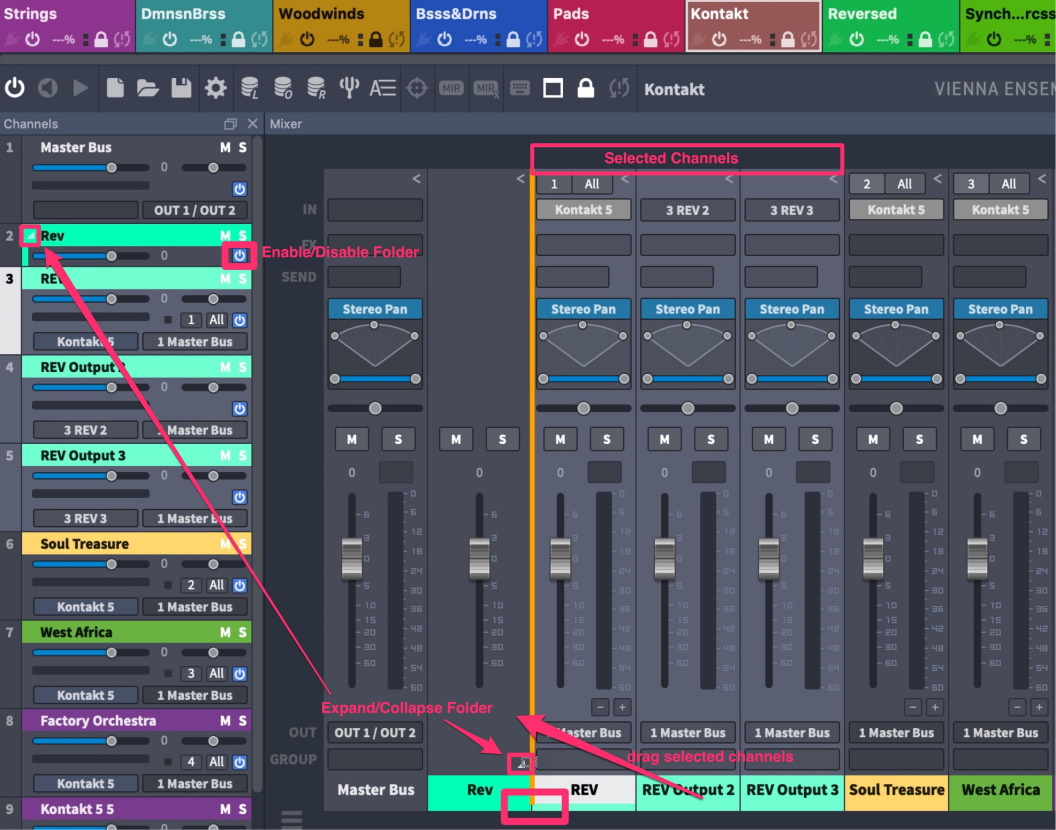
Move channels in the Channel Pane or Mixer according to your preferences.
You can collapse single channels (in the mixer) and expand and collapse all channels by holding down SHIFT:
It is possible to undock the Mixer, the Channel Pane, Automation Mapping, the interfaces of all virtual instruments and MIR Pro (if available) to use these windows in separate windows (or on a second screen).
To customize your mixer view, choose which mixer elements should be displayed in the lower left corner of the mixer:
Folders
Organize your template by creating folders and subfolders.
To drag channels into a folder, select the channels you want to move and drag them into the upper part of the folder , until you see a small gap at the end of the orange line that shows up, then drop the channels.
You can expand and minimize each folder by clicking the small arrow in the folder channel.
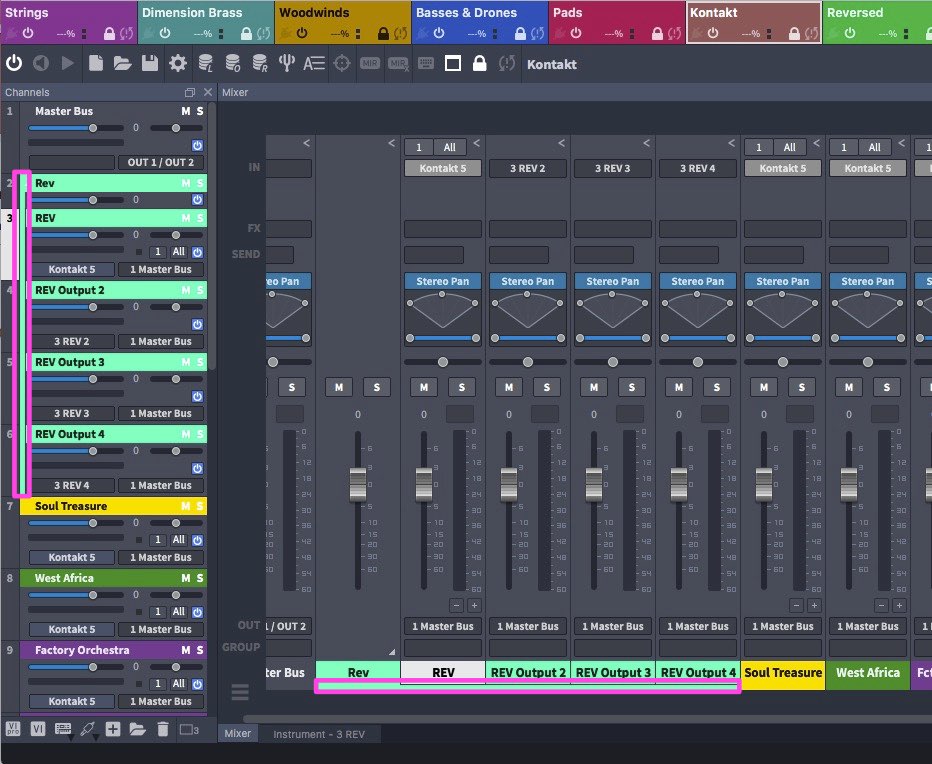
You can now also enable and disable folders, and this feature is automatable, too!
Each folder will create an extra line for orientation, which will be displayed in the colour of the folder .

Enable / Disable Instances, Folders and Channels
Enabling and disabling Vienna Ensemble Pro instances and folders unloads all plug-ins and their allocated memory from the selected channel(s), while keeping data intact.
As with individual channels, the power button will initiate unloading the sample content of the contained tracks, while keeping the sample location stored . This way, you can free up your RAM and CPU while being able to reload all plug-ins just like you left them.
You can also automate enabling/disabling instances, folders and channels with Vienna Ensemble Pro's Parameter Automation, so you are able to load certain setups while your project is playing back.
A useful option to keep your templates small, as you can enable whole instances with just a few clicks!
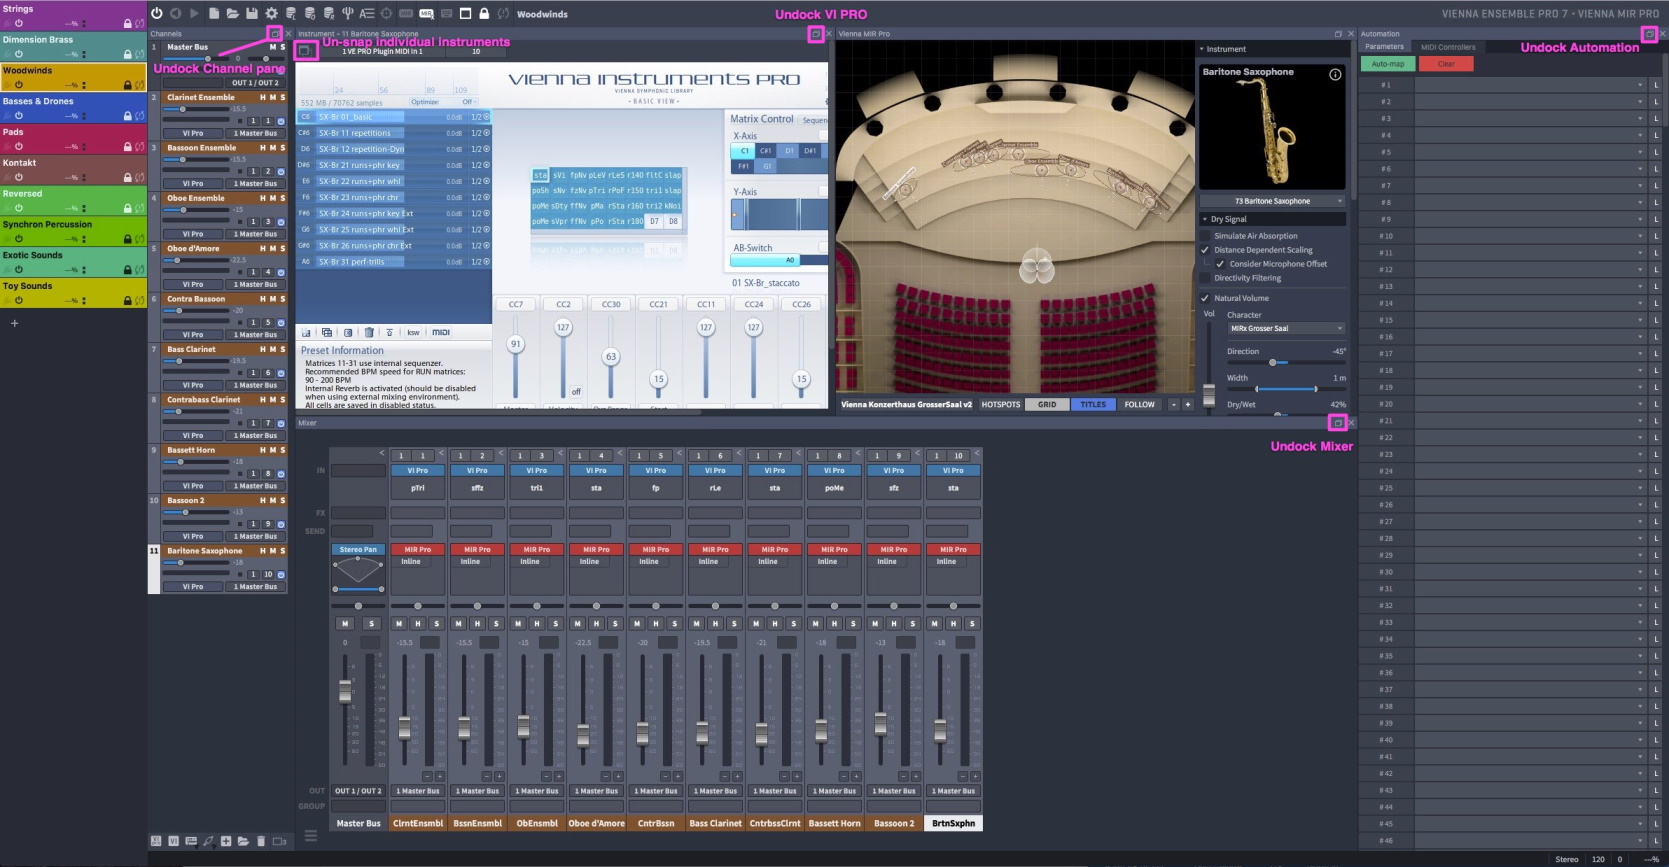
Re-arranging Windows in an instance
To undock a window within an instance, double-click its title bar or click the small undock button in the upper right corner. To dock an undocked window again, double-click its title bar.
To re-arrange a docked window (as shown below), simply click and drag its title bar over the main window.
Indicators will be displayed when you’re placing the window over a valid location on the main window.
The Instrument window offers the option to unsnap individual instruments.
The big " unsnap " button in that window lifts that particular instrument's user interface out of the shared area and makes it a free floating window.

Channel Options
Right-click on the channel you want to change, and you will get the following options:
Delete/ duplicate channels
Save and insert Channel Sets from Disk (all settings and loaded samples on selected channels)
Copy and Insert Channel Set to/from cache (new in Vienna Ensemble Pro 7)
Enable/disable channels
Copy/paste Feature (specific channel settings)
You can copy and paste specific parameters of each channel.
Additionally, you can also define the name and color of selected channels.
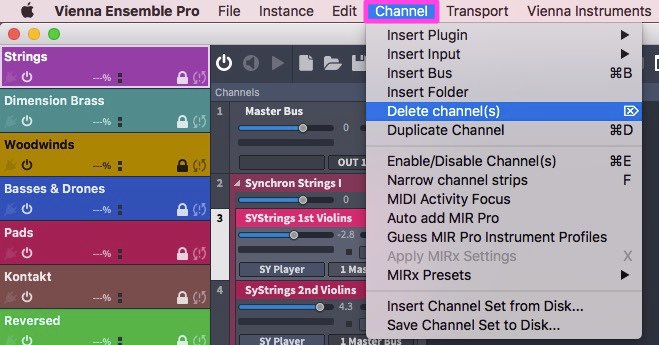
All channel context options can also be found in the channel menu.
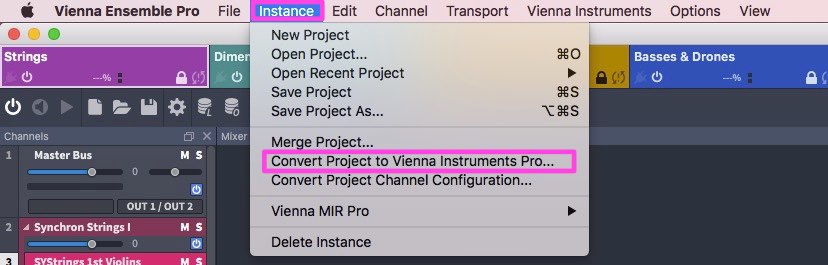
Converting / Merging Projects
Converting a Vienna Ensemble Server Project (that contains original Vienna Instruments instances) to Vienna Instruments Pro is possible as well. This option is available in the "Instance" menu:
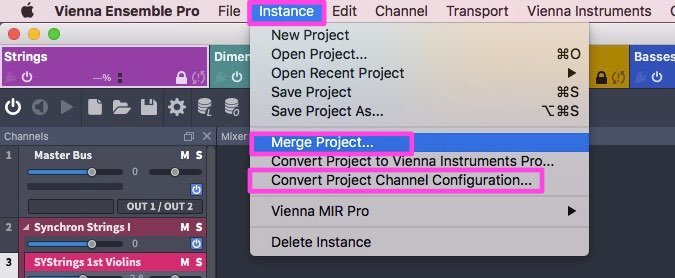
Merging existing projects (of course also from older Vienna Ensemble templates) is a possibility on the Instance Level.
You can also convert a project to a different channel configuration.
This is a very useful option to convert a stereo project to any surround configuration: Simply load your project using this conversion option.

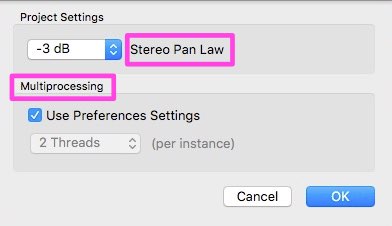
We have also added the option to set a pan law (both a default setting and a per project setting), which applies to all included panning plug-ins. And now you can also set threads preferences per project: